
Homelab Hardware
This is the first in a series of regular posts detailing my journey building a “mini-data center” (and I use that term very losely), or homelab. I’m writing these posts and publishing them on a twice a month schedule to keep myself motivated to do the work for all my never-ending side projects.
But, why?
It’s a totally fair question to ask. Why would you want to spend your nights, weekends, and hard earned money building servers and writing software to put on them? You’ll probably read through the list of plans I have for this homelab and conclude that there’s an easier solution to all the problems I’m trying to solve. And you’d be right, but that’s not the point. I love building things, whether it’s writing code or putting a water cooled computer together. This is an extension of that passion. I also want to challenge myself to learn new things and really put that learning into practice.
Here’s a small taste of the things I’m planning to build (and thus the future posts on this blog):
- A web app to store my collection of recipes and generally make cooking easier for me
- A collection of sensors to monitor my garden, alert me when plants need watering/feeding, and possibly even automate some of those things
- A custom music streamer to power a whole home audio system without using Alexa/Siri/Google
- An LED “simulated sunrise” to make waking up easier
- A mini-data center complete with custom network, CI/CD, monitoring, and orchestration to run all that stuff
Hardware Choices
Generally speaking, each homelab needs 3 things: computing power, networking, and storage. Before I could get started building my homelab, I needed to figure out what the building blocks would be. Plus, while there are a ton of ways to go about building a homelab, I needed to make my decisions based on the following restrictions:
- Since the only place for me to put these things in my apartment is right next to my desk, I can’t have any servers that sound like jet engines
- The breaker in my office already trips randomly, so putting machines with very high power draw is probably a bad idea
- I want to be able to upgrade incramentally, instead of having to spend $100s-$1000s whenever I need more computing power
Computing Power
Normally, when you look at homelab setups on the internet, you see people buying used enterprise servers off eBay. But, given my requirements, that really wasn’t an option. I looked into using older enterprise PC’s like the HP EliteDesk or even used corporate laptops. They’re a really great way to get decent hardware extremely cheap since businesses upgrade on cycles and a ton of these flood the used market whenever companies decide to get rid of them.
But, an even better option was to buy a bunch of Raspberry Pis. Since they run on ARM chips, they’re extremely power efficient and quiet. You can spend as little as $35 depending on your workload, which is practically nothing in the world of computer hardware. For the kinds of workloads I’m doing (persistent containers, web development, etc), I don’t need a ton of raw processing power, so the quad-core processor with 2-8GB of RAM will do just fine.
Networking
Networking was a little easier to figure out. I already have Ubiquiti gear in my apartment thanks to the YouTube algorithm constantly feeding me videos about over the top home networking, so using their switches was a no-brainer. While they’re propbably not the best things out there, they’re certainly good enough for what I’m doing.
Storage
Storage seems to be one of those really down and dirty topics that I could easily go down a rabbit hole trying to understand. Trying to juggle redundancy, performance, capacity, availability, price, etc. are all pretty tough. Plus, it seems really easy to go overboard. The good news is that for now, I don’t really have the need for anything more than a simple 250GB Samsung SSD. Once I get going, I’ll probably need a proper solution, but that’s something for Future Jackson to figure out.
My Setup
The core of my homelab are the little Raspberry Pis that run all my software
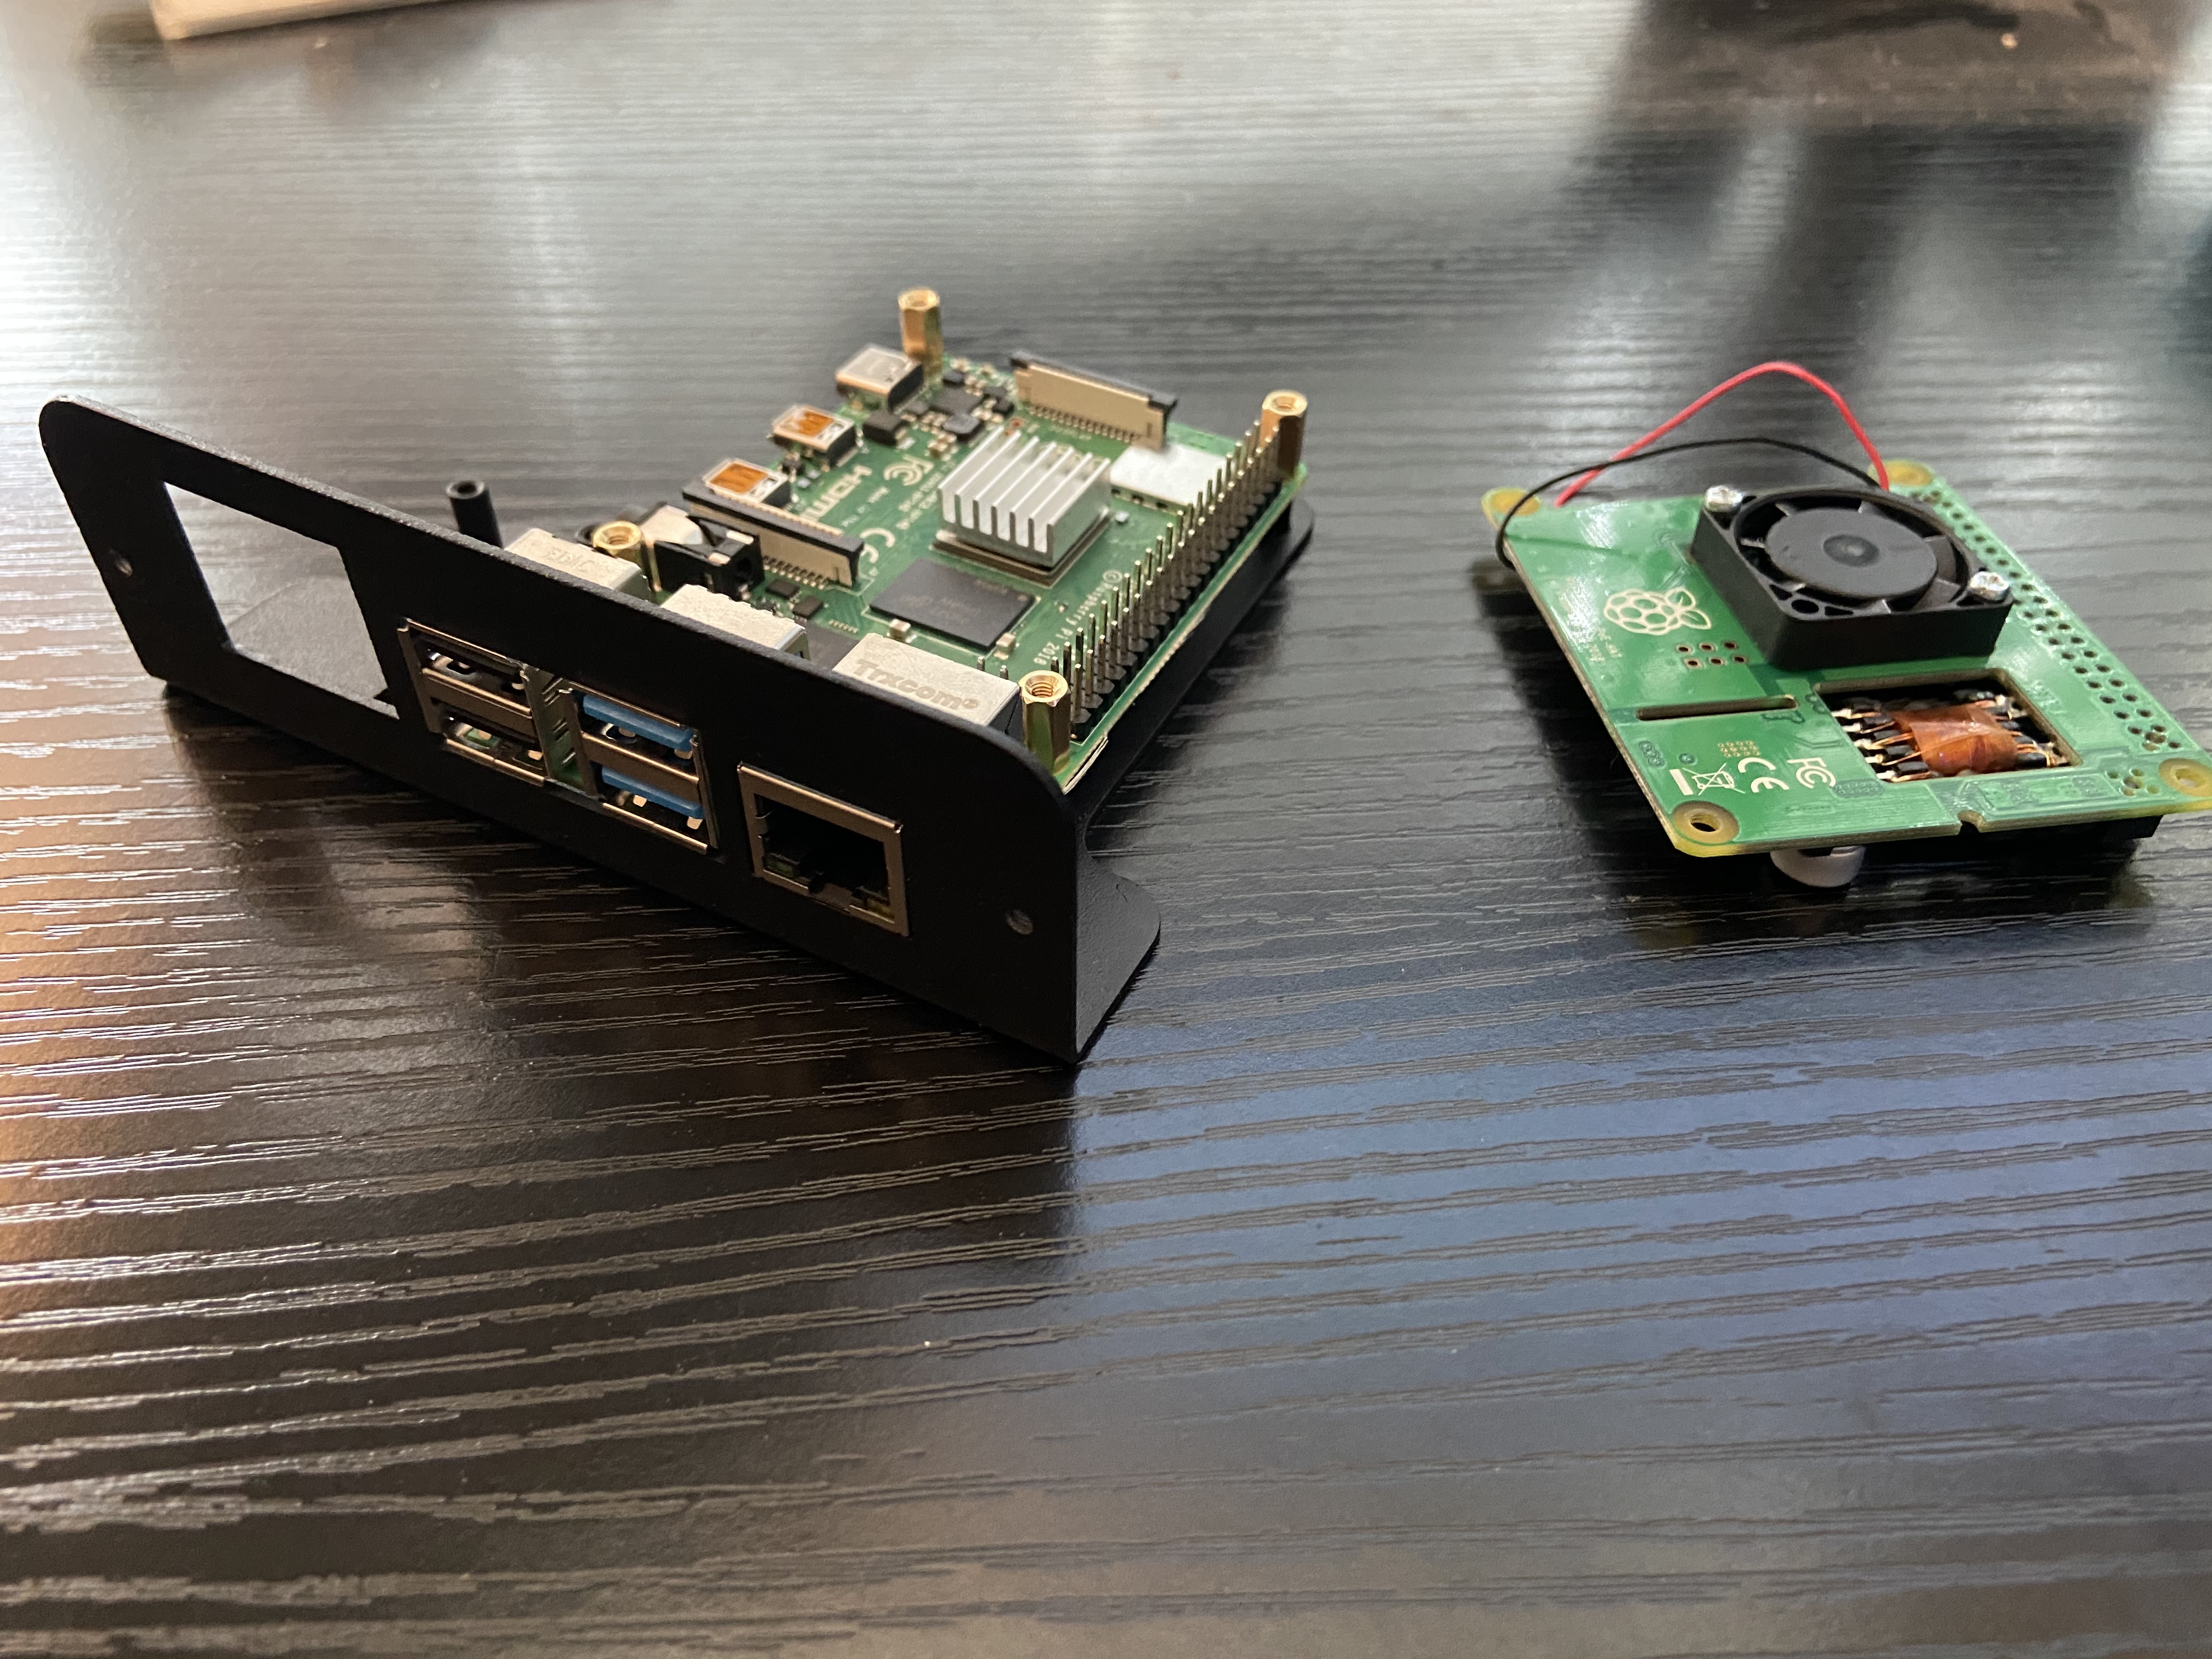
On the left there you can see a Raspberry Pi inside a little carrier that I can use to put it in a rack (picture below). On the right is a little board that lets the Pi recieve power through Power over Ethernet (PoE), making the whole setup much tidier. While it’s an added expense, at scale only having to run 1 wire for power and networking makes managing the Pis much easier. Since the PoE board came with a fan, I added a little aluminim heatsink to the Pi. It probably doesn’t need it, but a pack of heatsinks was like $15 on eBay, so why not?

Here, you can see the Pis placed in the rack, with a switch in the middle providing both rows of Pis with power and internet. If you look closely, you can even see that the Pi on the bottom right connects via a black USB cable to that Samsung SSD I was talking about earlier. It’s resting on top of the switch, right beside the second Pi on the top. Like I said earlier, not the best solution, but it’ll do for now. Most of the spaces in this rack are empty, but that’s just an excuse to buy more things later on down the road! Adding a new Pi only costs me around $75, so it’s pretty easy to scale up if I need to.
And that’s my basic hardware setup. As I continue building it out, I’ll post more about it here.