
Building a Network
Over the past few months I’ve been upgrading my home network from your typical home setup into something that’s slightly more robust and extendable. Throughout the process, I’ve learned a lot more about networking, improved the connectivity on my devices, and set the stage for a big homelab.
Installing Hardware
I was very fortunate in that my apartment came “wired” with cat 5e ethernet cables in the walls, so I was able to use that as the backbone of my network. Now, when I saw “wired”, what I mean is that the builders just stuffed some wires in the wall and then someone came in and hacked them all up to set up a landline phone
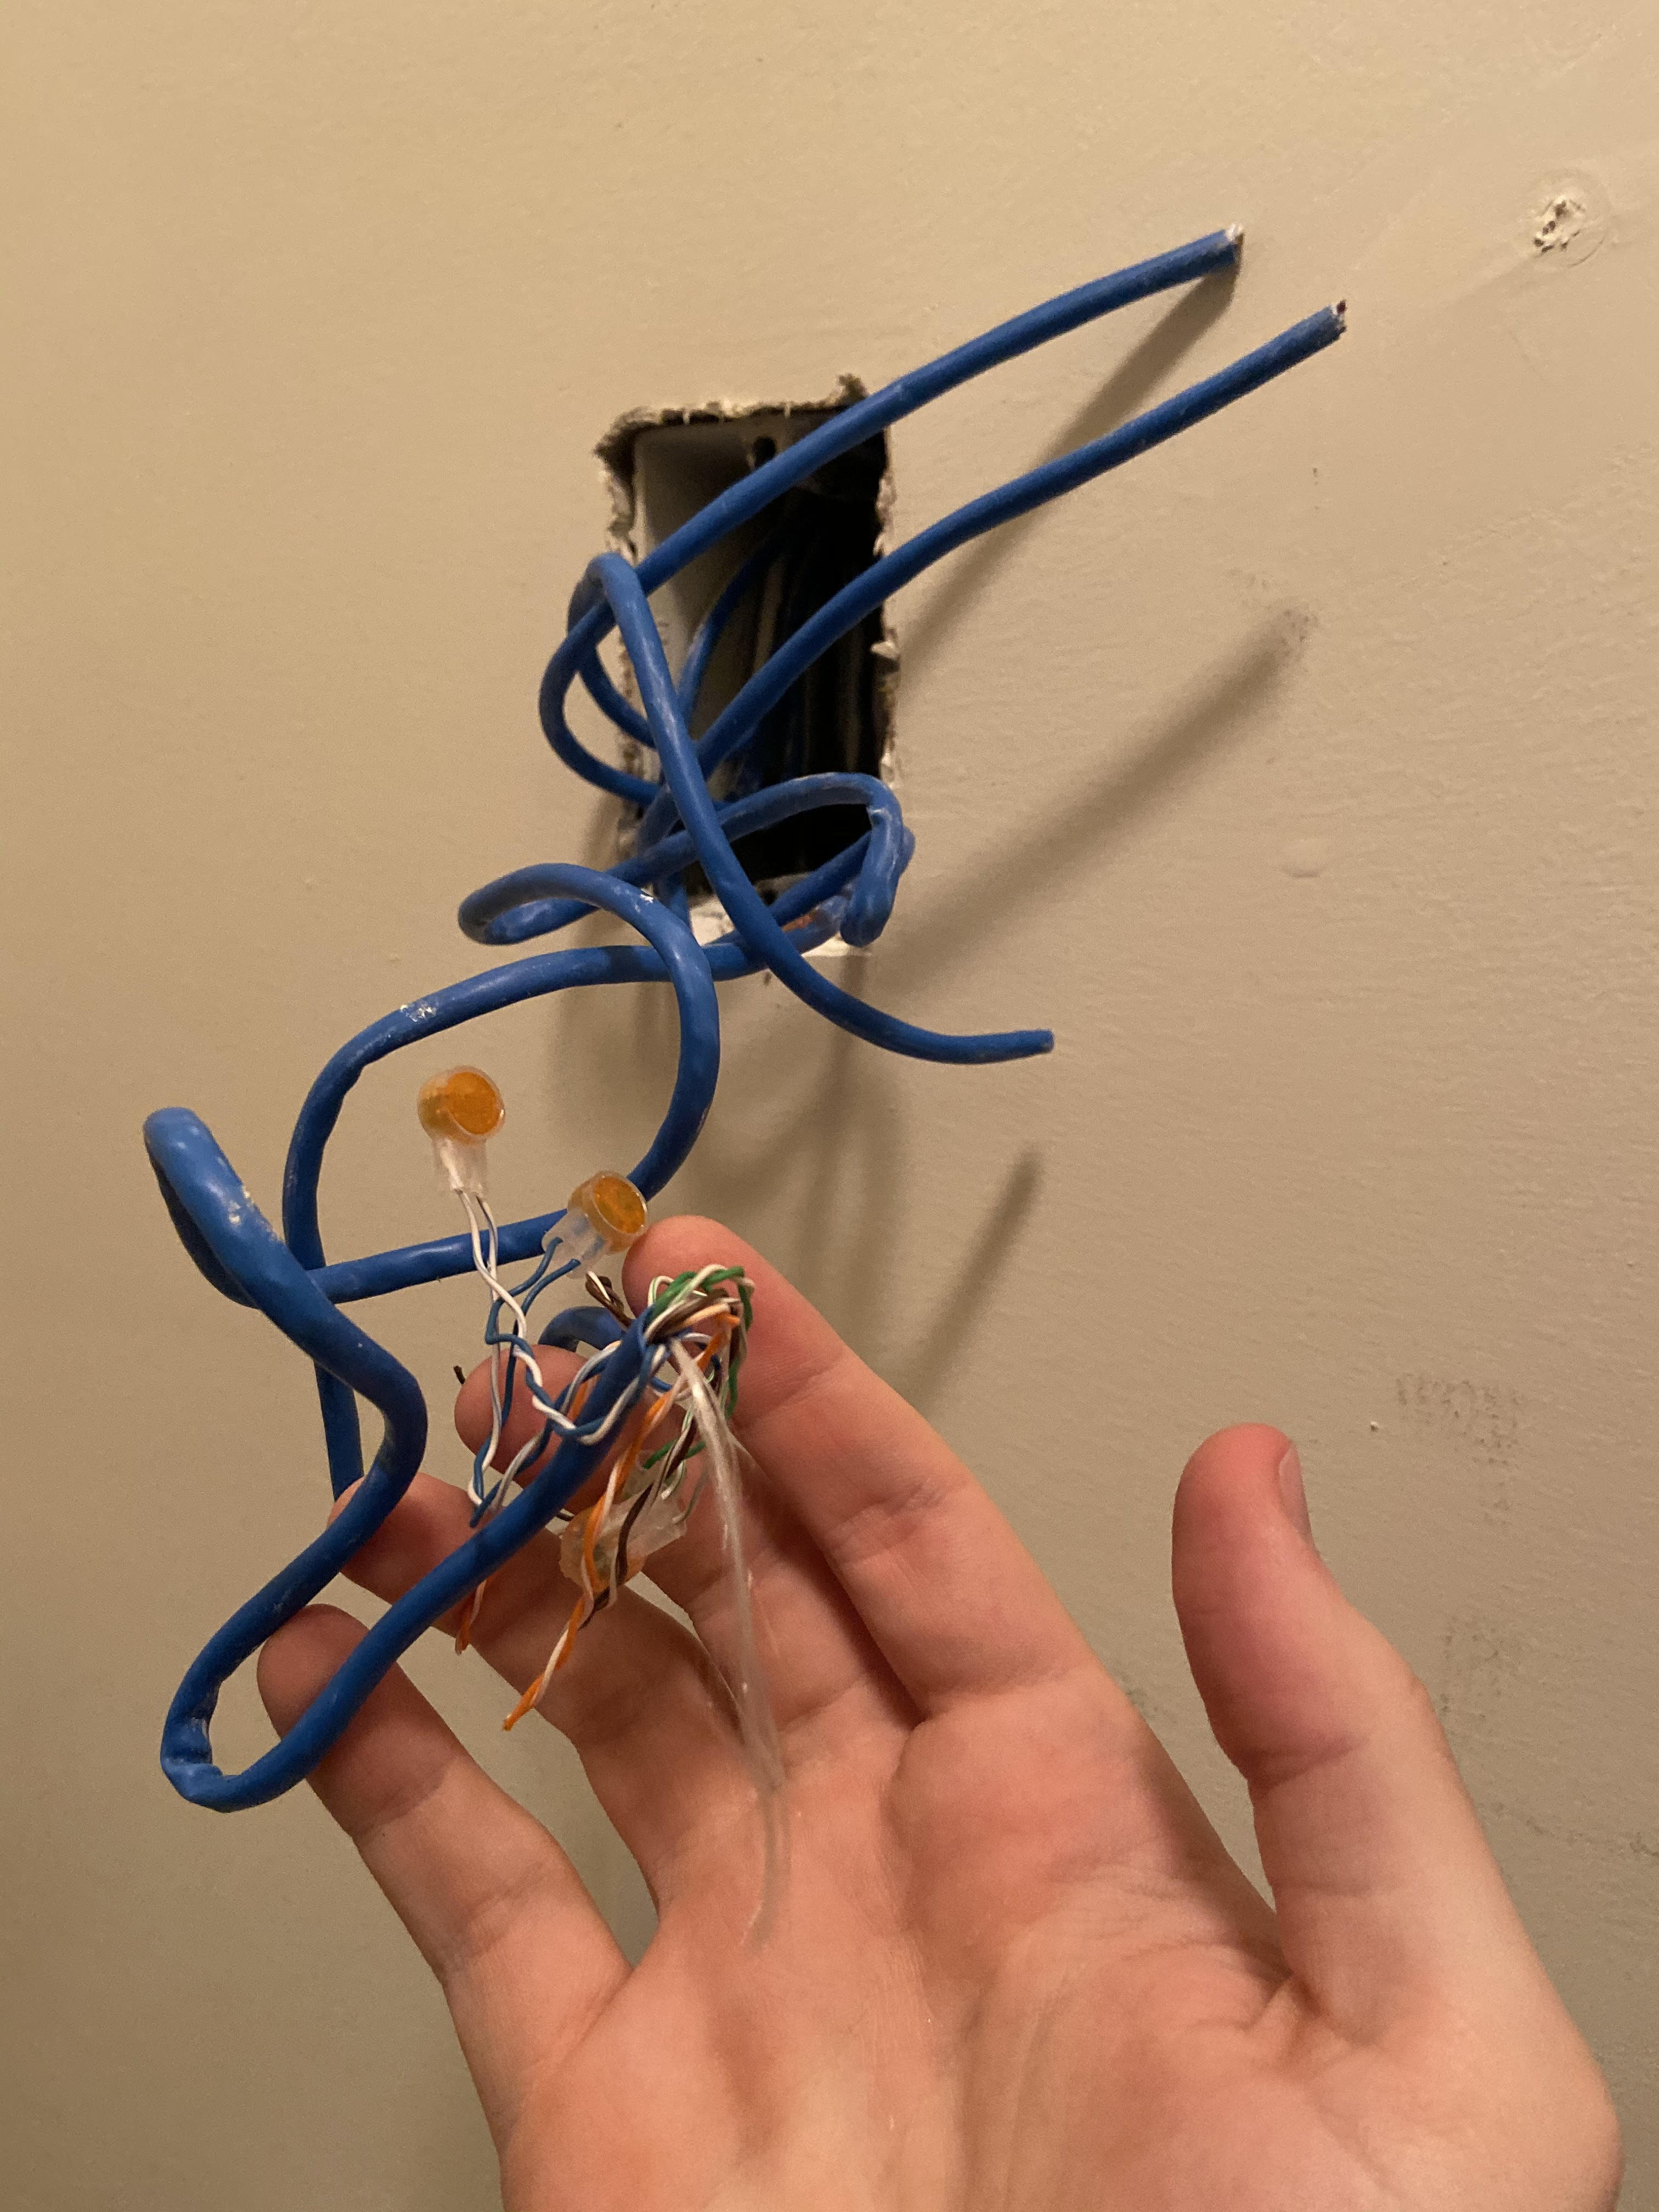 Figuring out where all these wires went took a while. Still not sure where one of them goes….
Many of the other ethernet jacks around the house were either wired for a landline or just completely hacked up. But, that’s nothing a few hours of work can’t fix. After connecting all the wires to proper terminals, I was able to install my network equiptment. In the picture below, you can see the cable line going into my modem (black box on the left), which connects to my router (middle white box), which is connected to a power over ethernet (PoE) switch that powers many of the other network devices around the apartment. That hole in the wall above is now the outlet with all the ethernet cables going into it. I’ll clean up the cables someday….
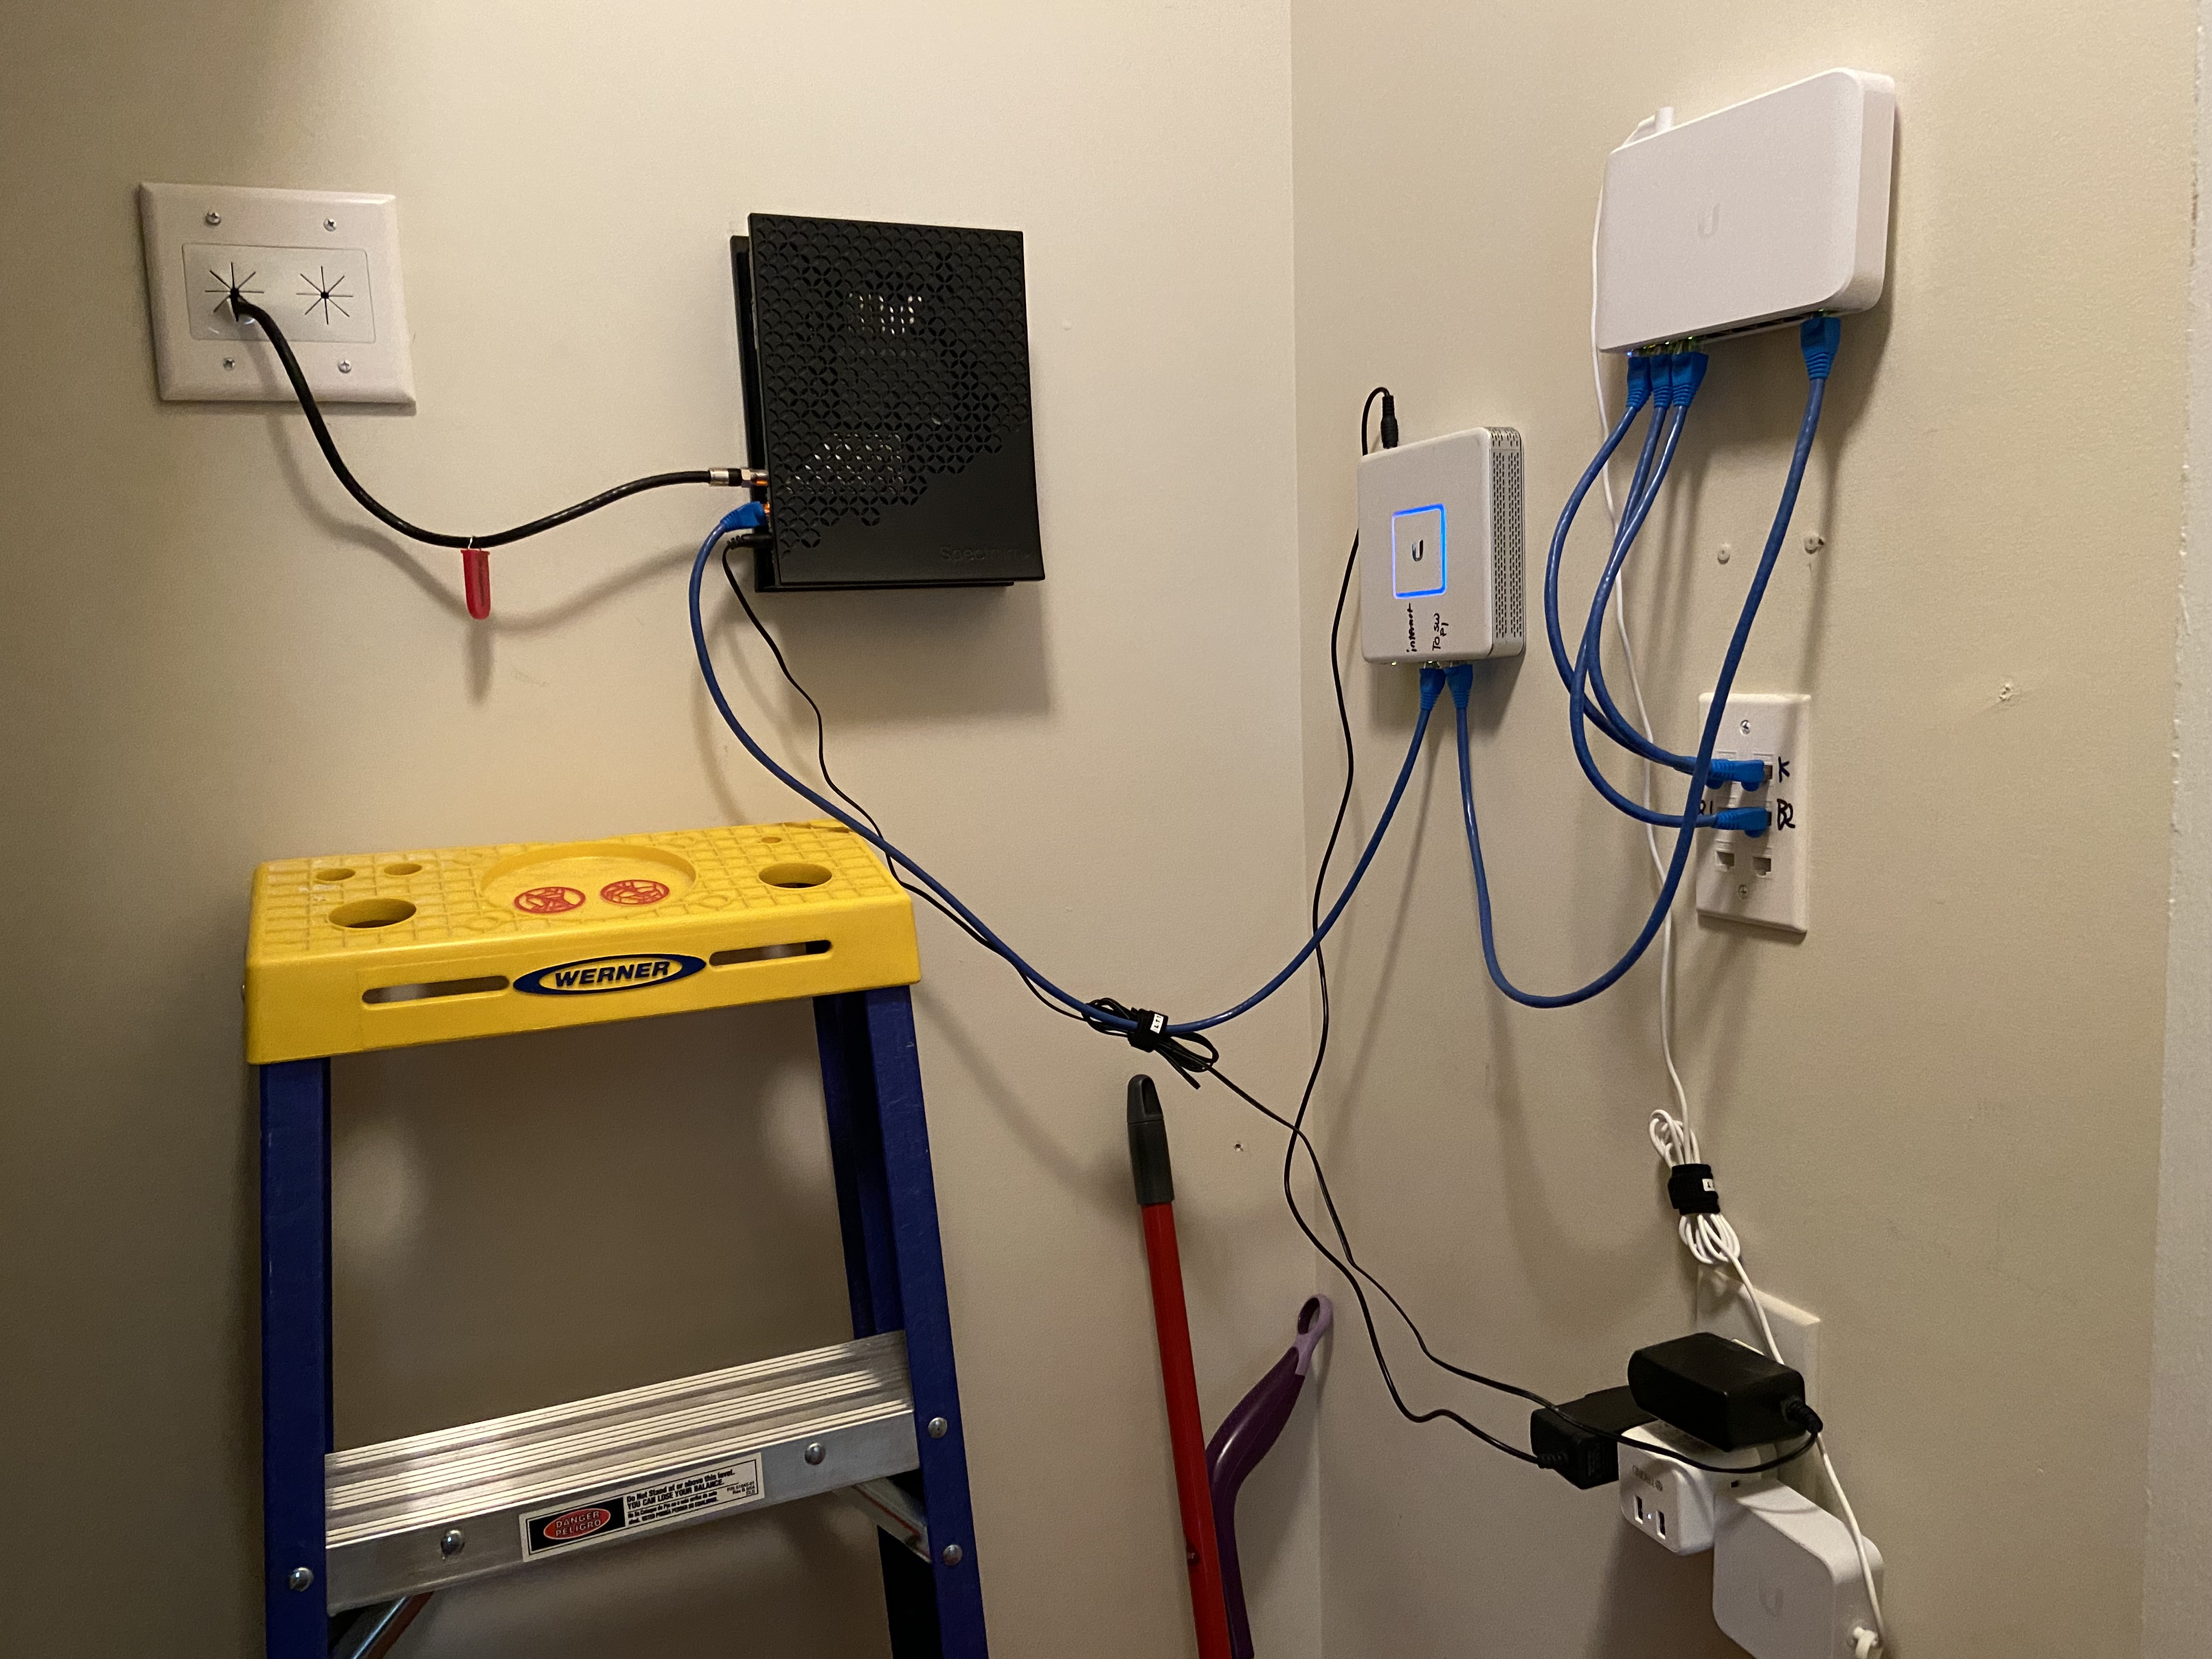
I happened to be setting up my network right after buying my first impact drill. So, naturally, everything that could be attached to the wall was attached to the wall.
Lastly, I set up a Wireless Access Point high up in my living room to ensure I have the best WiFi coverage.
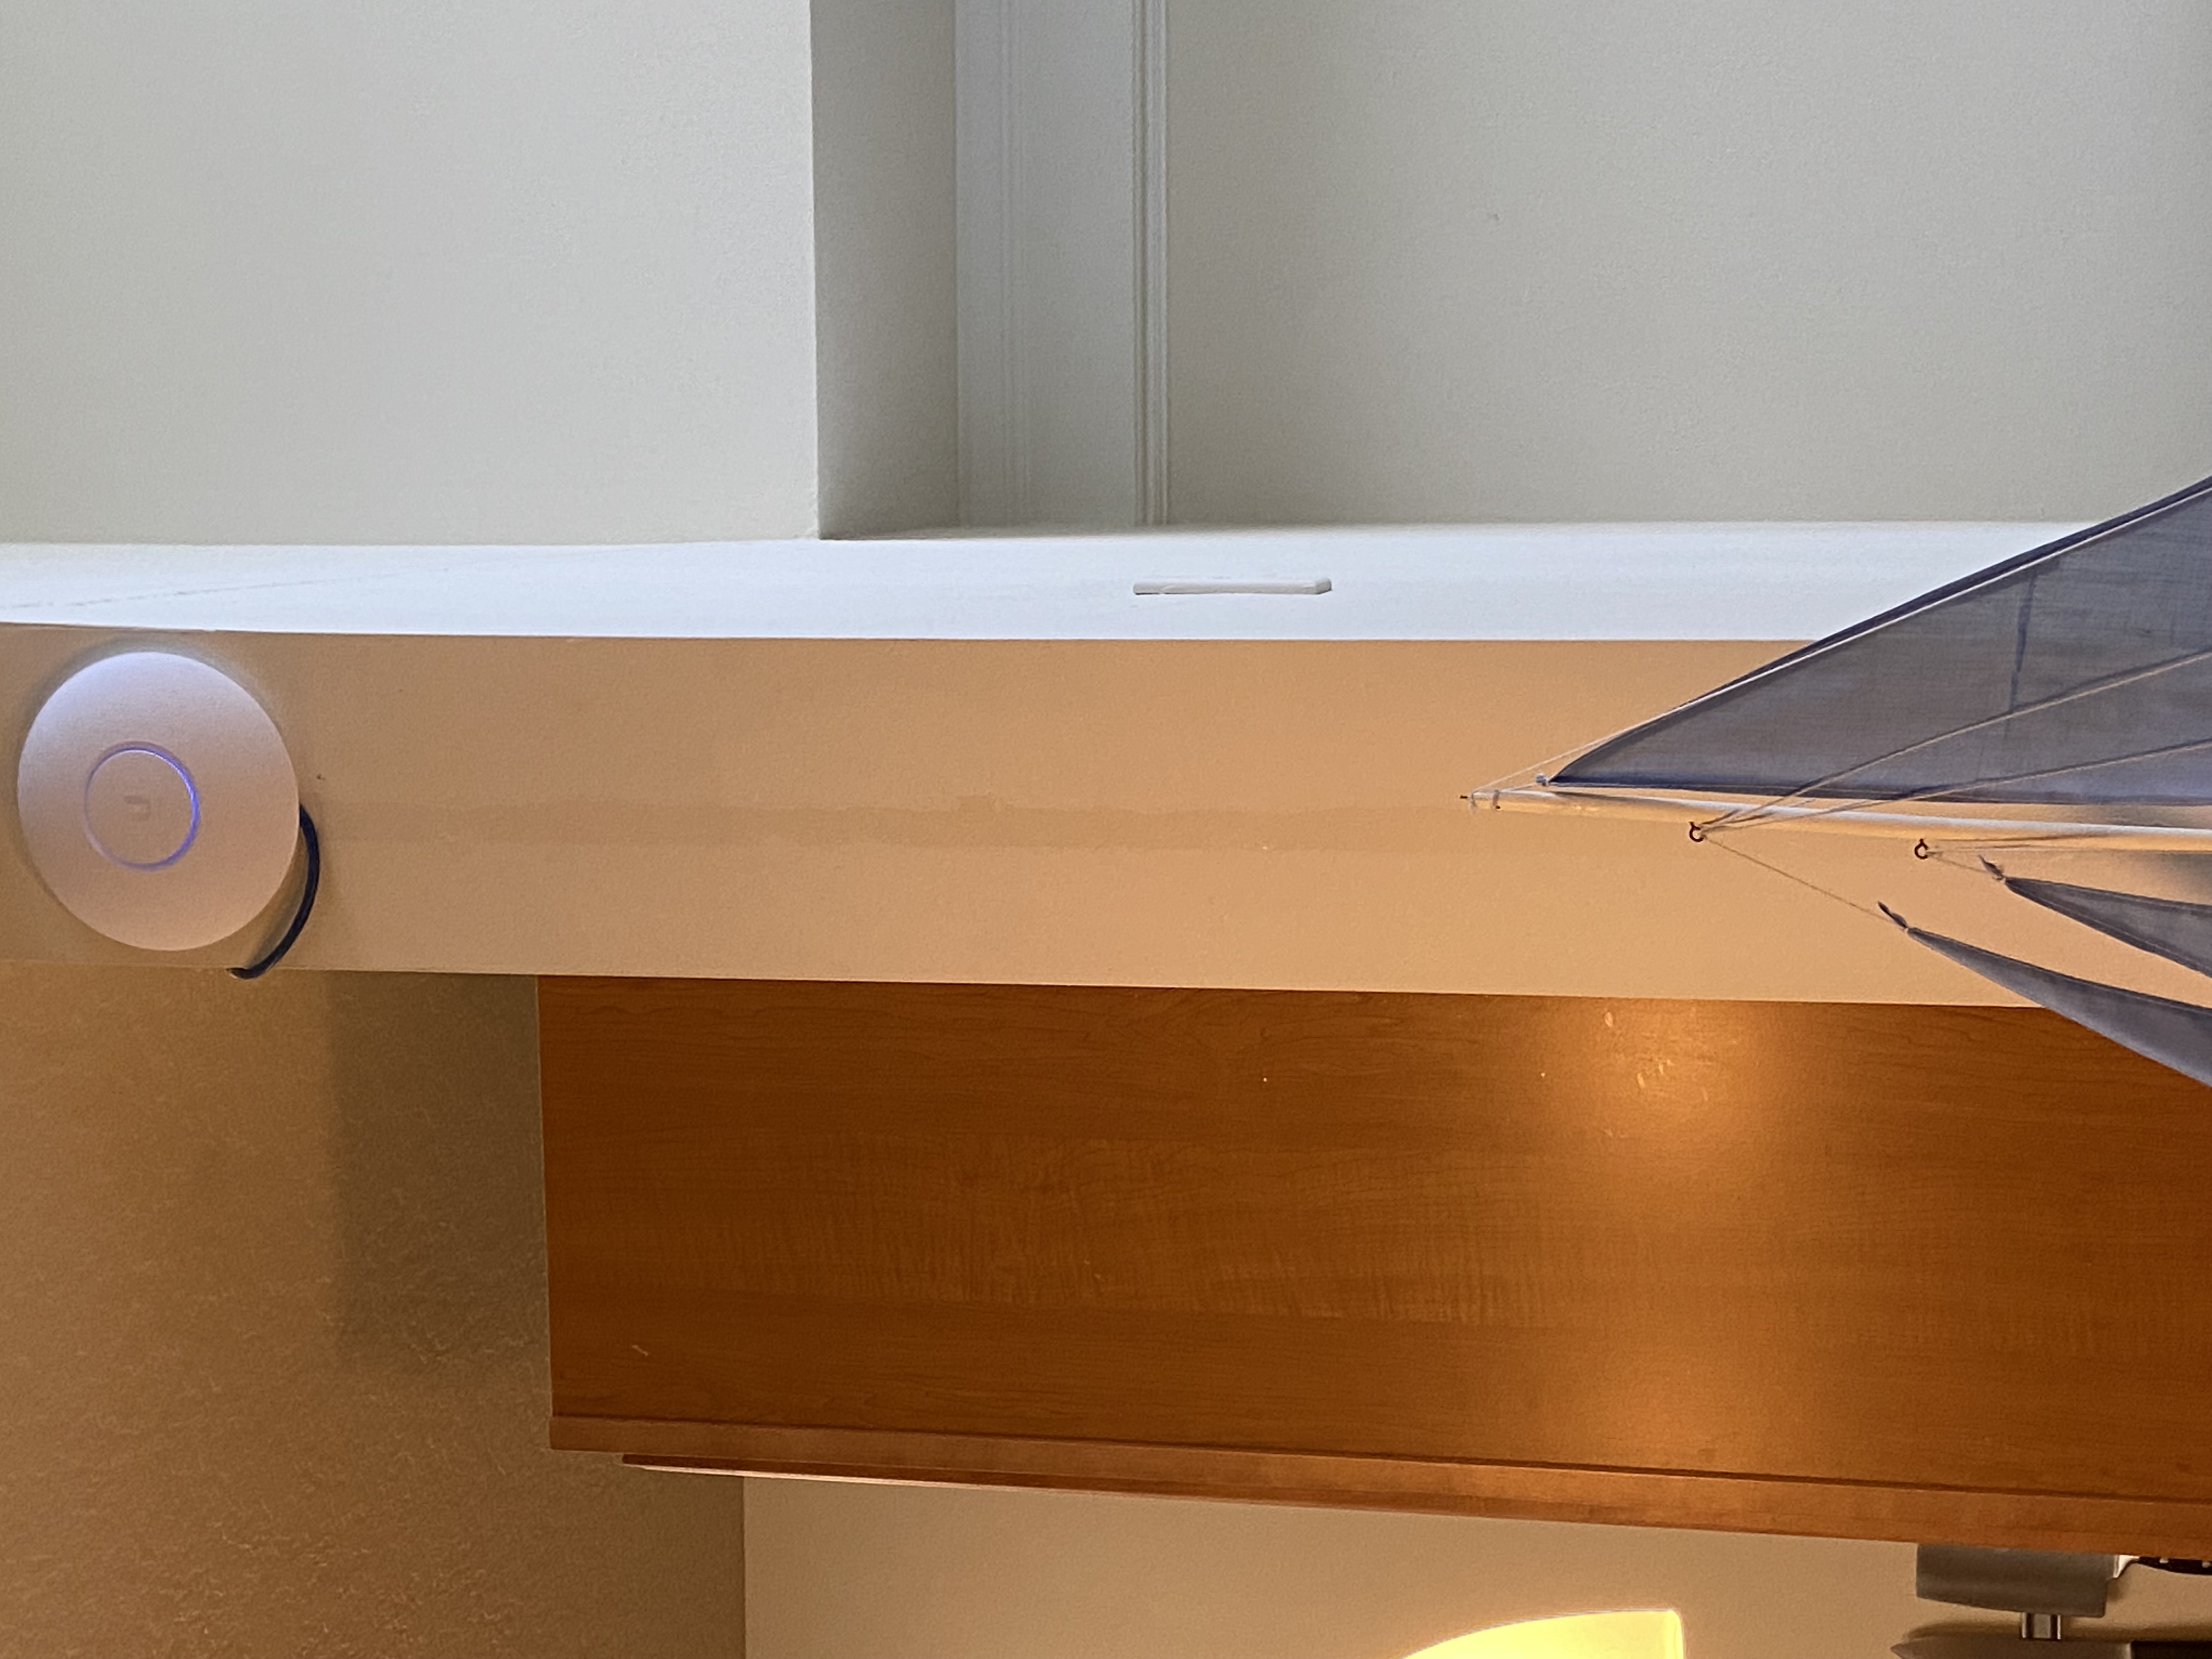 As you can clearly see, I’m not married yet
Managing the Network
Like I said in a previous post, I’ve chosen the Ubiquiti platform for my networking equiptment. While it’s a bit pricy, it does come with this nice software to help me manage the network. I can easily set IP’s for my devices to organize them, inspect traffic to make sure nothing bad is happening on my network (very important for future smart home projects), and diagnose any issues that come up.
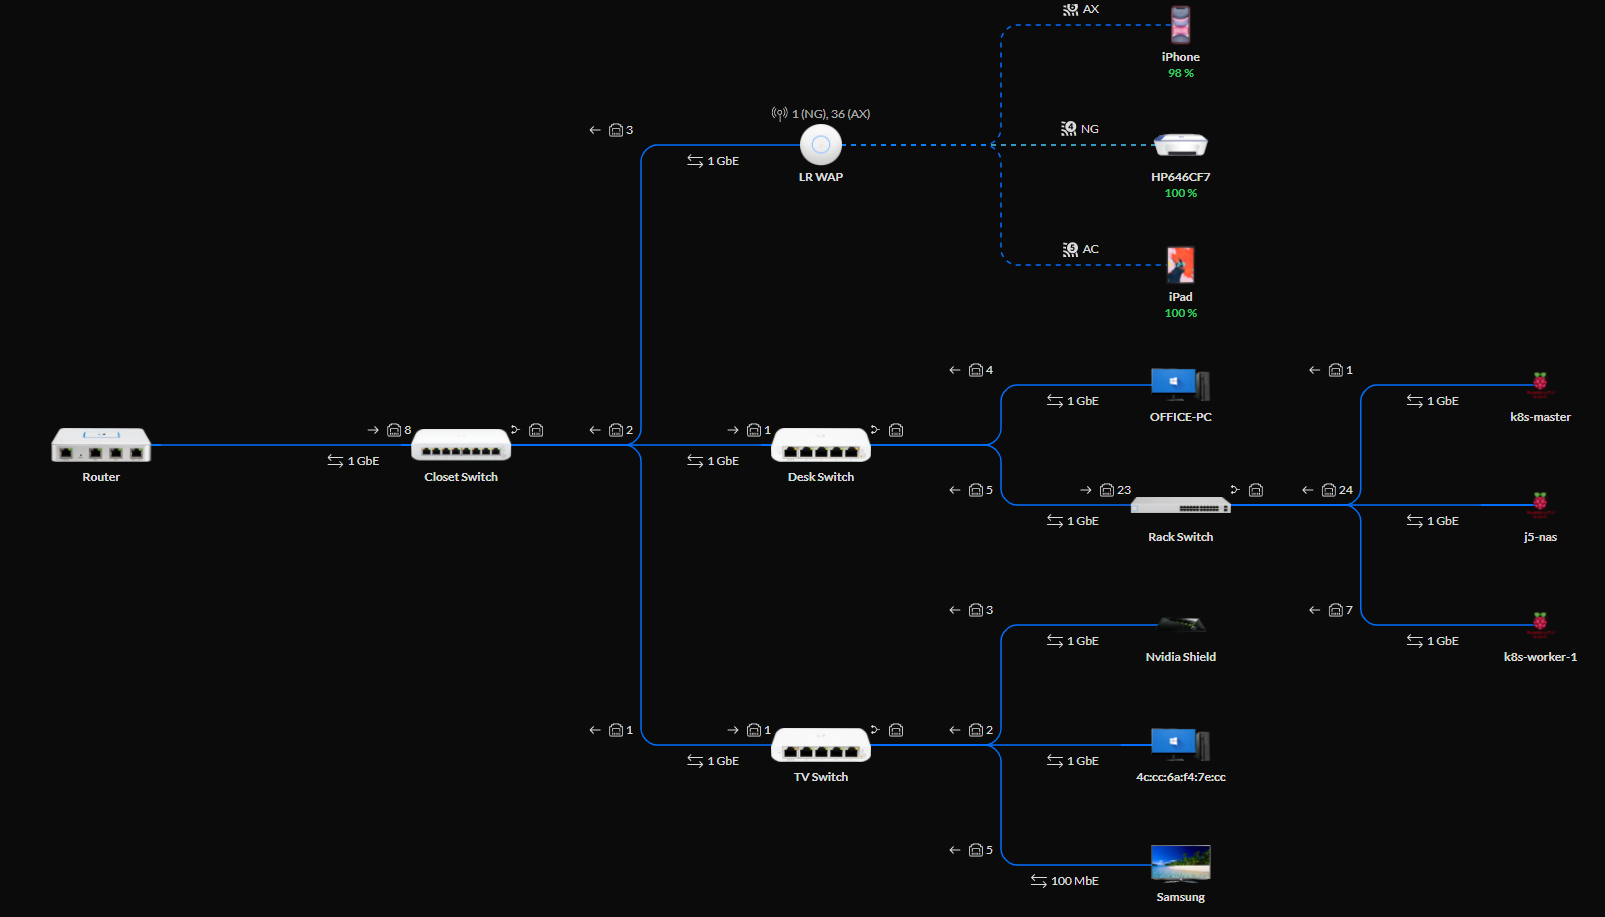 Plus, it has all these pretty diagrams!
DNS
Like most technology professionals, I have a love/hate relationship with DNS. It’s great that we don’t have to remember IP’s and all, but it’s usually the source of all kinds of weird issues. But, with all the things I’m building, I need to set up my own DNS server. Remembering whether my smart home server is on 10.0.10.62 or 10.0.20.47 just isn’t practical. So, I installed PowerDNS on a Raspberry Pi and after a couple weekends of learning how the heck DNS really works, I was able to set up my own top level domain to attach friendly names to.
 Let’s just ignore that “Not Secure” sign for now
And thanks to a neat kubernetes integration I can have my cluster automatically create a new DNS record whenever I deploy an app. This is great because it’s one less little thing I have to do when I’m finally done coding. This was one of my biggest motivations for going with kubernetes in the first place.
While I’ll surely be adding more to the network over time, this is the last big batch of stuff I’m planning to do to it for a while. Next time, I’ll talk about setting up a NAS, integrating that with kubernetes, and backing it all up to the cloud.